Getting Started with Poynt
For a full database of help articles/videos, please visit Poynt directly at:
Poynt Support

Before your terminal arrives
You’ll want to set up your Poynt Web Portal account. Open the welcome email sent to you, and click “Get Started” to create your login credentials. Moving forward, you’ll log in at Poynt.net to view your dashboard. Once your terminal arrives, this is where you’ll be able to see your real-time customer and transaction data. Within your HQ account, you can easily visit the Poynt Help Center to review helpful video tutorials and support articles.
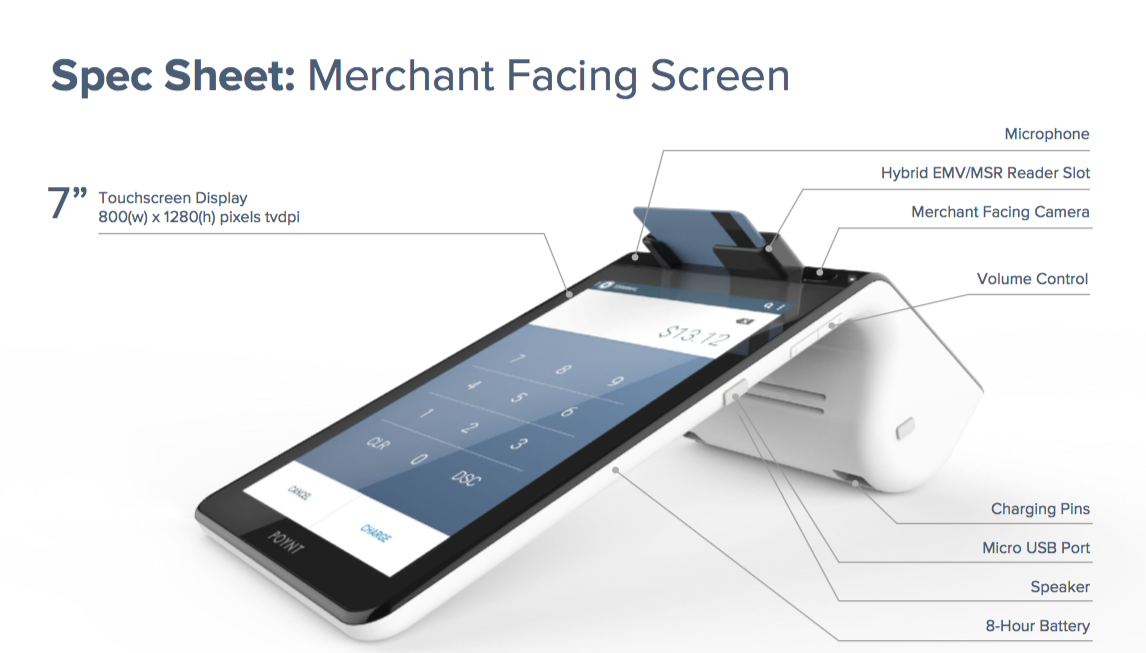
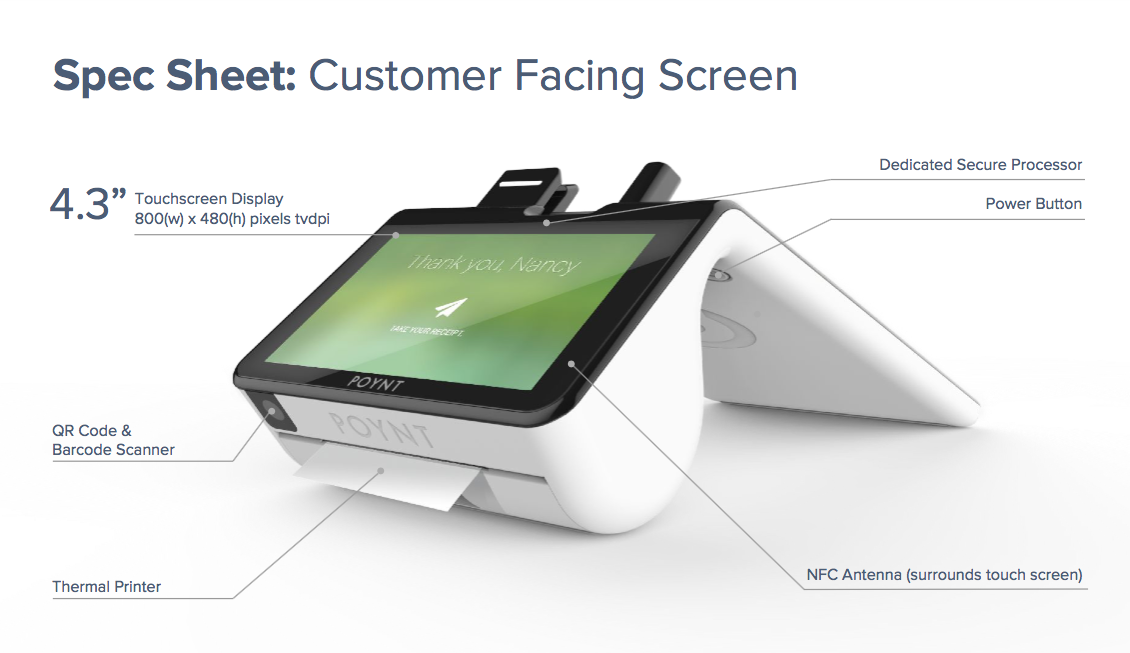
We also recommend familiarizing yourself with the device itself prior to arrival. Navigating your device is simple, Poynt will operate like many tablets you’ve used in the past. The merchant-facing screen will permanently face you as the merchant, whereas the smaller customer-facing screen is intended for customer input, such as tips, receipt preferences, and signatures.

Smart Terminal Setup and Activation
- Placing your Device: There are two screens – the bigger one should face you and the smaller is directed at customers.
- Power on: To turn on your device, press and hold the power button behind the merchant screen for 3 seconds. When placing your terminal on the dock make sure that both Poynt logos are facing you, aligning the terminal with the charging pins. Your device will charge while on the dock. We recommend fully charging the device (approximately one hour) before initial use.
- Connect: Your device will walk you through connecting to the internet via WiFi the first time you turn it on. To connect via Ethernet instead, simply plug your cord into the back of the dock. After connecting, it may begin to update its software as required. This can take a few minutes. Allow the device to download, install, and reboot before getting started.
- Activate: Follow the on-screen steps to activate and enable your device.
- Load Paper: To load a fresh roll of receipt paper into your device, lift the latch on the printer compartment and pull out. This will release the latch. Unwrap the roll of paper, make sure that the paper is taut to the roll and place the roll into the printer compartment. The edge of the paper should be oriented toward the top of the roll to ensure the receipt prints properly.