Using MX Merchant’s Virtual Terminal
The MX Merchant’s Virtual Terminal and QuickPay feature is very powerful, and lets you save and retrieve customers for future payments.
Getting to Know QuickPay
You can review this video for an overview of Quickpay, or follow the step-by-step directions below for more detailed instructions.
Getting Started
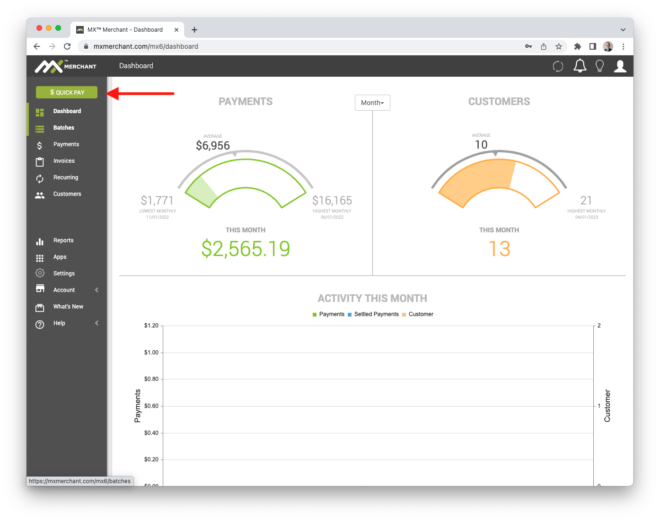
The first step is to login to MX Merchant, then select QuickPay from the options in the lefthand navigation.
Using QuickPay
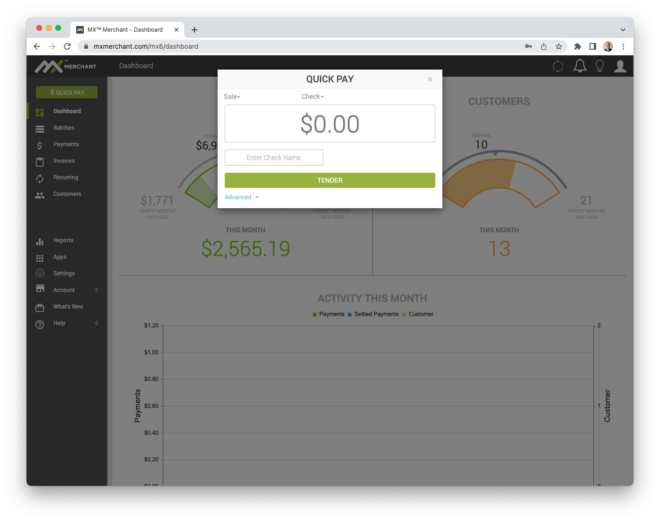
QuickPay is an incredibly robust tool. It lets you take payments for credit & debit cards and also ACH if you have that feature enabled in MX Merchant. It can also record payments in cash or via check for bookkeeping purposes. You can see the default screen at left.
Selecting Payment Type
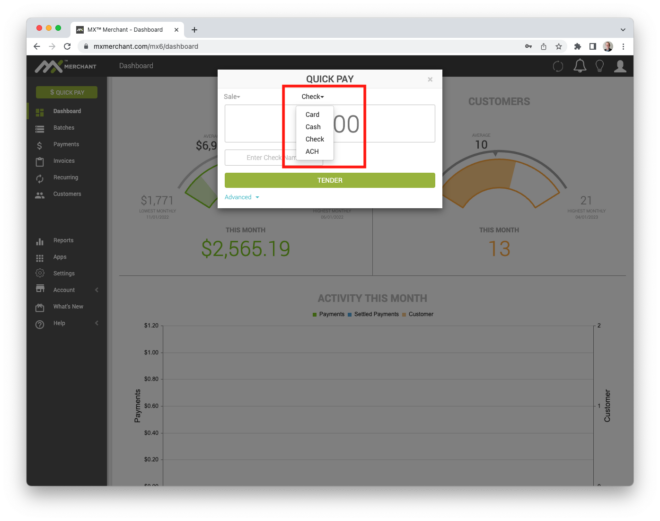
Since QuickPay lets you take various payment types, the first thing is to select the type you are going to process. We are going to focus on card payments. To change the payment type, you select the option you need from the dropdown menu just above the payment amount.
Using the Card Option
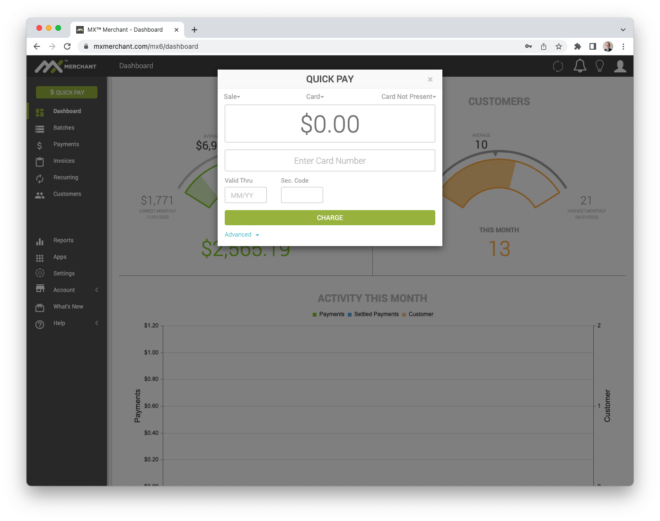
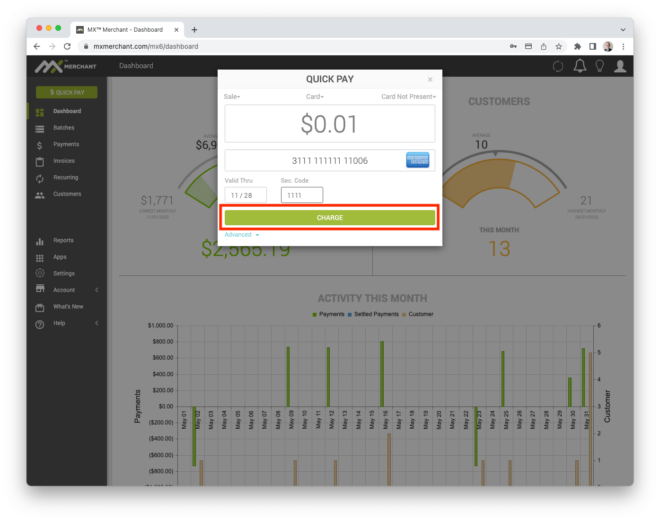
QuickPay for credit & debit cards is quite straightforward – you will need the amount to be charged, the card number, card expiration, and the card security (CVV) code.
Taking the Payment
Once you’ve entered all your data, taking the payment is as simple as selecting CHARGE at the bottom of the payment screen
A Successful Payment
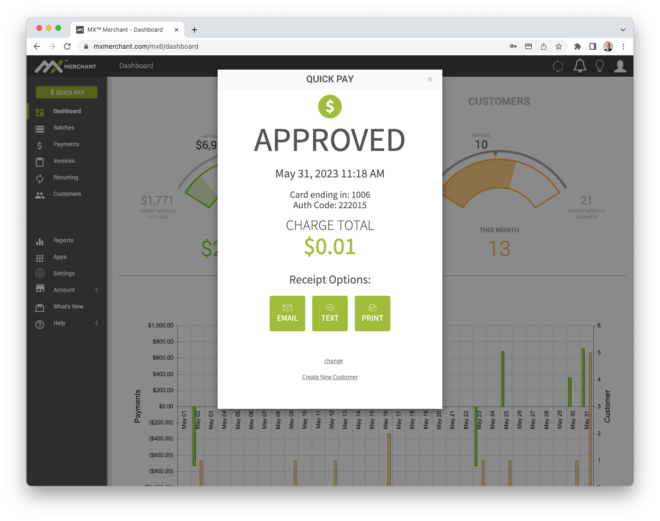
If the payment goes through successfully, you will receive the Approved screen. From this screen you can do two important things:
- Generate a receipt, via email or text, or print it out / save as a PDF
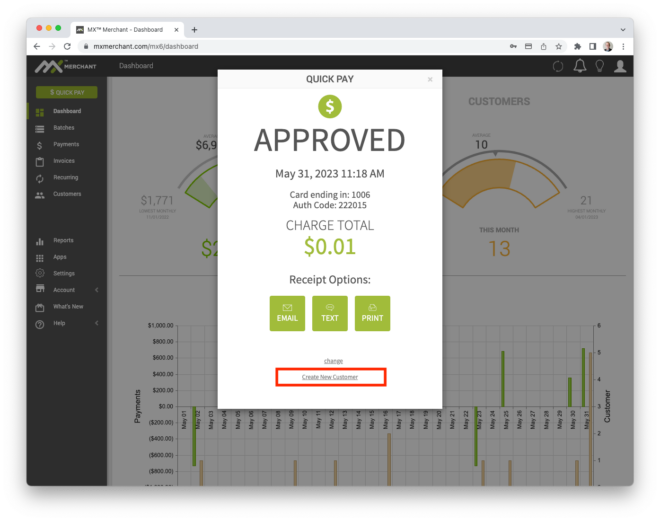
- Create New Customer, which lets you save this card information and associate it with a person or business for future use
A Declined Payment
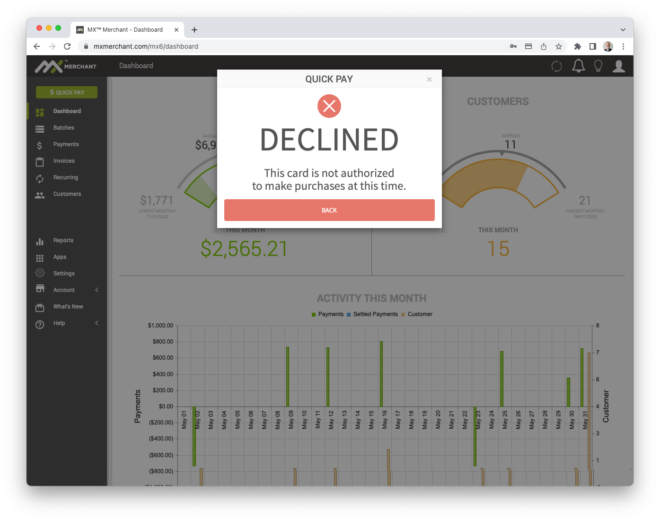
If for some reason the payment doesn’t go through, you get the Declined screen. There are no options from here except to go back.
Saving the Customer for Future Use
After a successful payment, you have the option to save the customer so you can easily take a payment again from them without entering all the same data. To do so, you select Create New Customer from the approval window. You can add either a person (who has both a first and last name) or a company (that simply has the company name).
It’s important to note that, while the customer data is saved in a readable format, the customer’s card data is stored in a manner called tokenization. The only part that is stored in a readable manner is the last four of the card so you can easily refer to it. The rest of the data is stored in a token that is called up and used in place of the card. This is for security reasons – if you don’t store the card data in a readable format, no one can steal the card data from you!
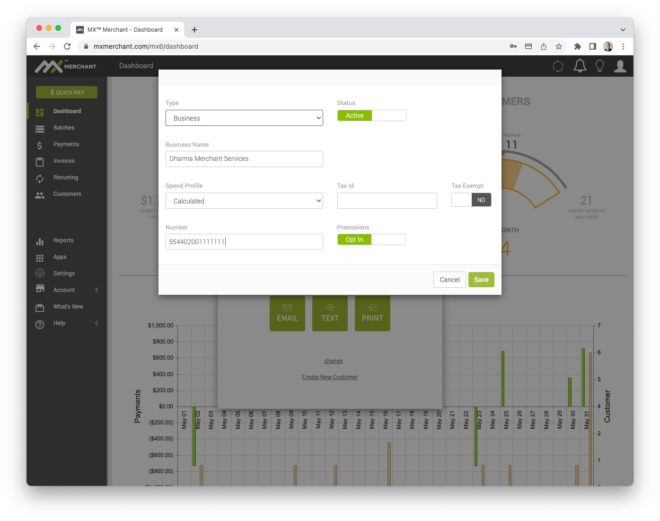
Adding a New Customer
Adding a person and a company are virtually identical – here we show capturing the information for a company. At a minimum, we need a company name, but you can also capture a Tax ID, or a Customer Number. There are some options for Active and to Opt In to promotions that we are going to ignore for now. Once you’ve entered the data, select Save.
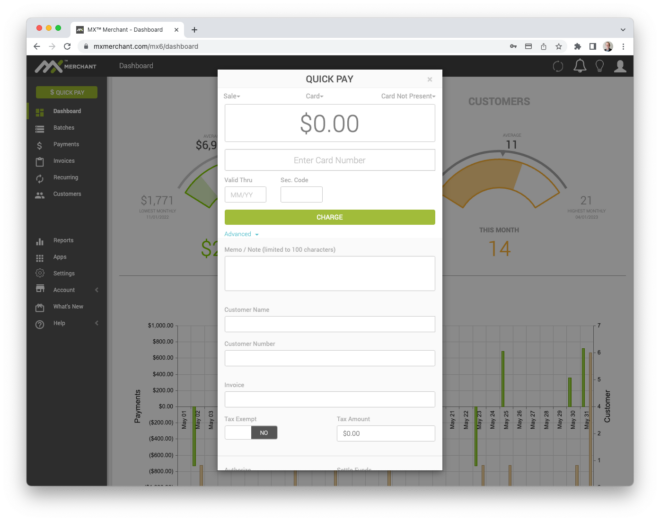
Taking a Payment for a Saved Customer
Using a saved customer is where the QuickPay process starts to deviate a bit. You are going to call up the QuickPay window in the normal manner, but now you are going to select the Advanced option in the lower left hand corner. Once you’ve done that, a new set of options appear. In these options, you can capture information like a Memo about the sale, an Invoice Number, or override the Tax option.
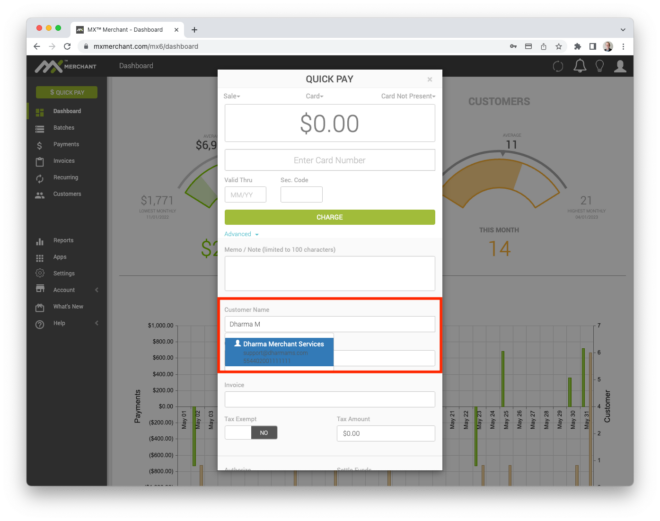
Recalling the Saved Customer
Now that we’ve got the advanced options open, we are going to start filling in the customer name that we want to retrieve. As QuickPay finds matches for the characters you are typing, it presents them in a pop-up menu that you can select from.
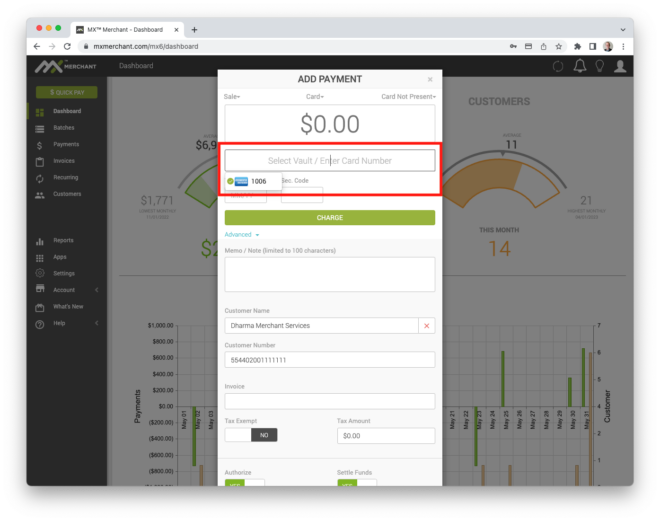
Retrieving the Stored Payment Card
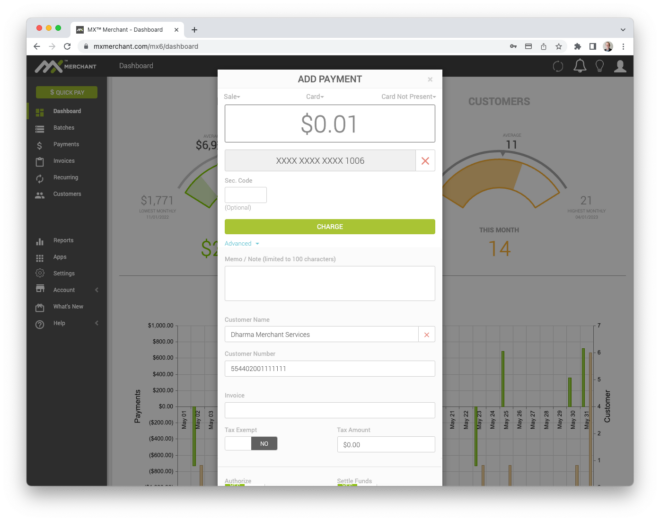
Once the Customer has been retrieved, the window changes a bit to reflect that it is using a stored customer. The next step is to load the card you want to charge into the screen. To do that, you click into the Select Vault / Enter Card Number area, and a popup will appear with the last four digits for any cards that have been saved for that customer. Select the card you want to use.
Just as a reminder: the card data is stored as a token, and all you can see is the last four digits of the card.
Taking the Payment
Once the stored card is loaded, you simply enter the amount to be charged, and select Charge.
Saved Customer Approval Screen
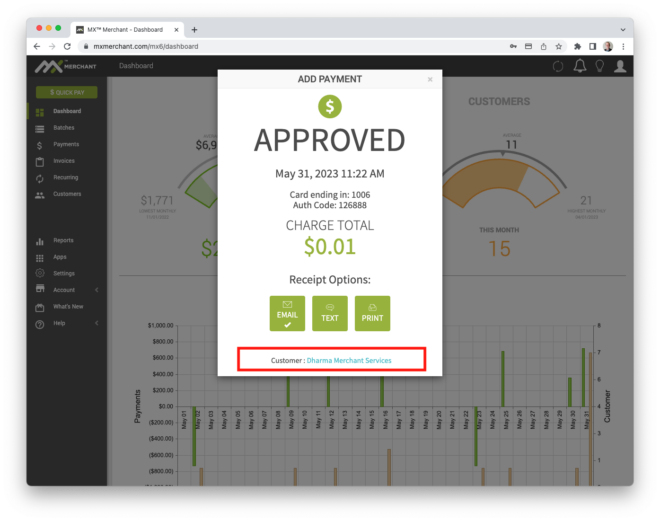
The Approval screen for a saved customer is virtually identical to the standard QuickPay Approval Screen, with the exception that the customer name is now shown at the bottom of the screen.
Sending a Receipt
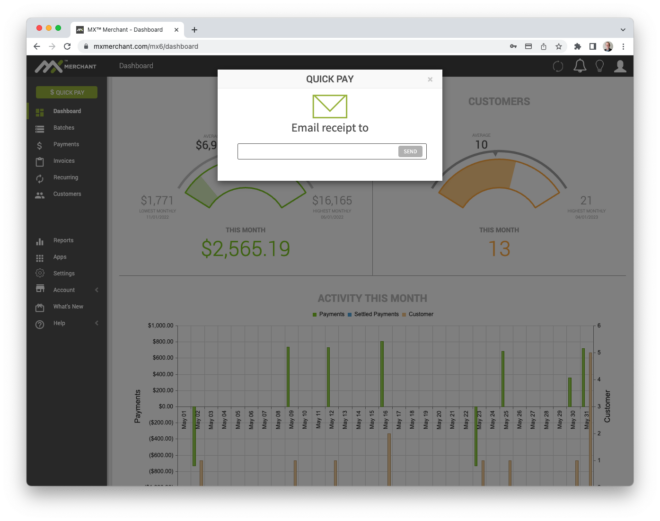
From the Approved screen, you have the option to email or text a receipt, or to print it. Selecting any of these options gives you a chance to enter an email address, a mobile phone number, or to select a printer.