MX Merchant – Recurring Payments
MX Merchant allows you to create and manage recurring payments as part of the MX Invoice feature.
Enabling MX Invoice
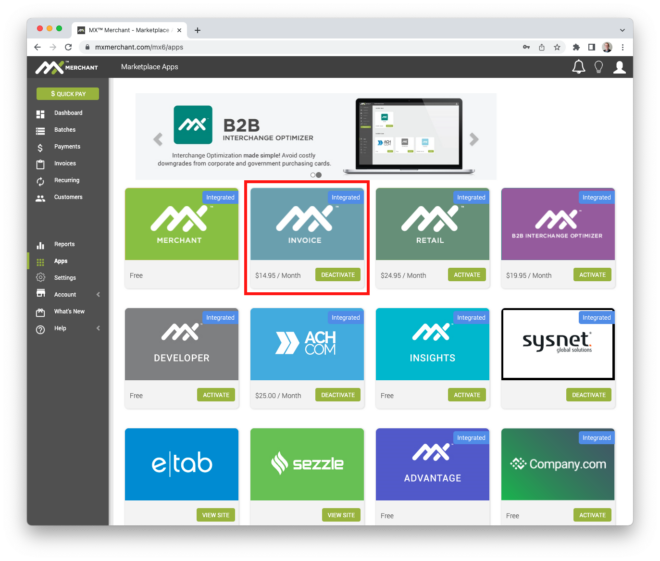
The first step to using Recurring Payments is to login to MX Merchant, and ensure that MX Invoice is enabled. You can do this in the Apps section of MX Merchant. You can skip this step if you know Invoice is already active.
Using Recurring Payments
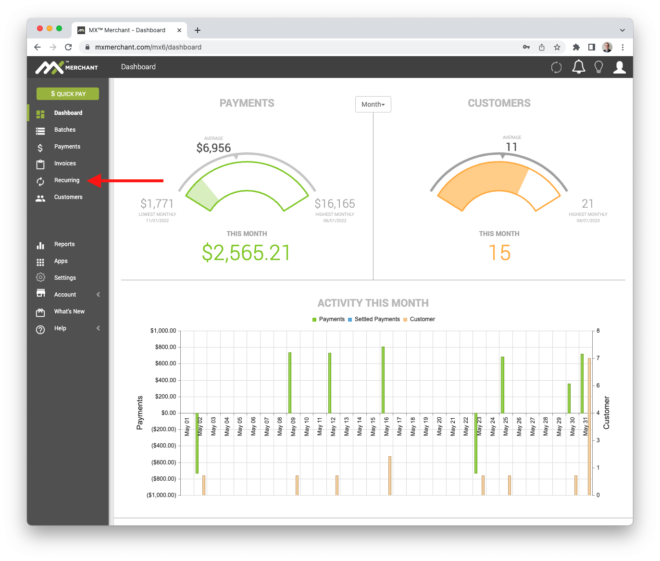
Once MX Invoice is enabled, you will see a new Recurring option in the lefthand navigation. Select it to get started.
Recurring Payments Landing Page
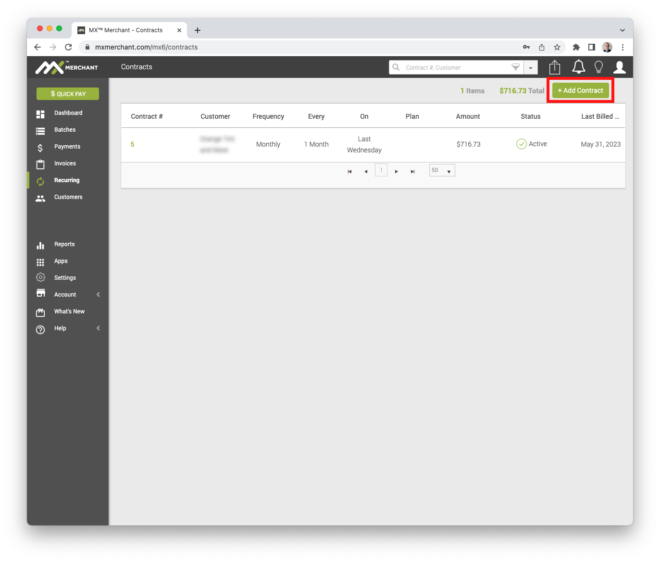
Once you have selected Recurring, you are taken to a new landing page just for your recurring payments. In MX lingo, these are called “Contracts” and that is the name of the page. To add a new contract, select + Add Contract in the upper right hand corner of the page.
Adding a Contract
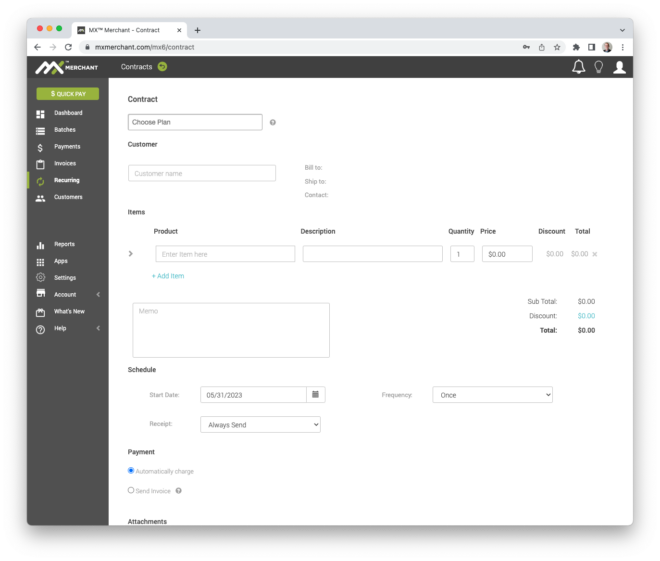
You use the Add Contract screen to enter all the relevant details about the new recurring billing. You can:
- Select an existing customer or enter a new one;
- Enter line items for what is being billed;
- Add a memo the customer will see about the bill;
- Schedule the recurring billing, either for a set number of times or for an ongoing period with no end;
- Define the payment method – to automatically charge a card, or to send the customer an invoice for them to pay themselves
Selecting your Customer
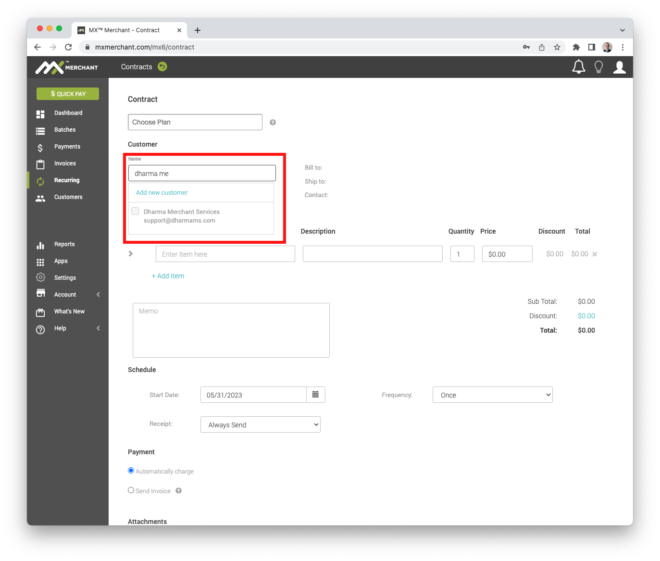
The Add Contracts page allows you to create a recurring billing for an existing customer, or to enter a new one. You start by moving your cursor to the Customer Name field. As you start typing, a pop up of matching customers will appear. From here you can select an existing customer, or select the Add New Customer option.
Adding a New Customer
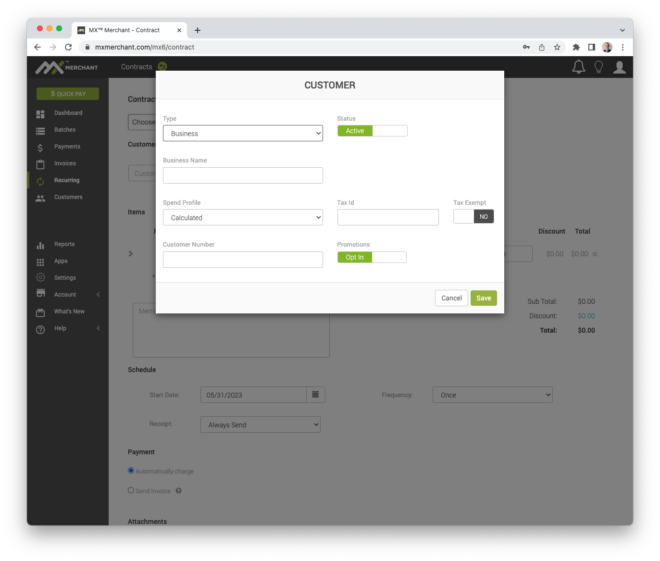
If you selected the Add New Customer option, you get a new popover window for entering the new customer’s information. You can select Person or Business, and fill in all the relevant information. That new Customer will automatically be added to the Customer Name field.
Setting the Items and Schedule
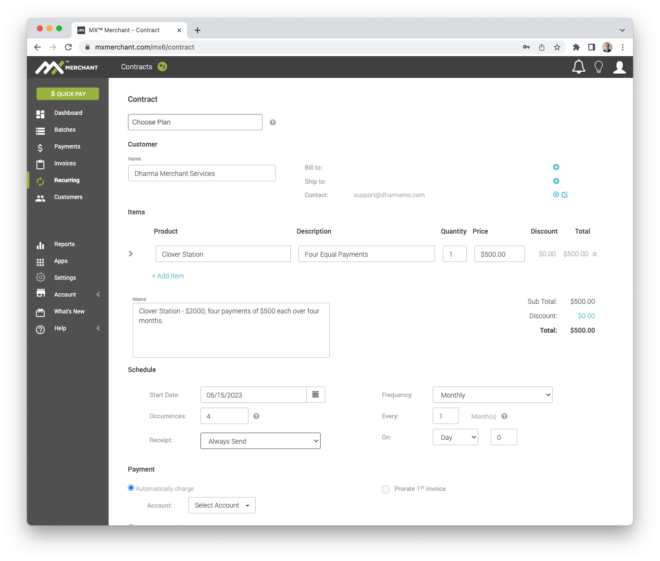
Under Items, you can fill in as many line items as you need to in order to capture what is being billed. You can also add a memo that the customer will see in their invoice – an excellent reminder of why they are being billed.
Once you’ve entered what is being billed, it’s time to set up how often they are being billed. You do that under Schedule. Here you can set:
- A Start Date;
- Select a Frequency of Once, Weekly, Monthly or Yearly (once is useful if you just want to schedule a future payment, and not have it recur);
- The number of Occurrences – a specified number, or unlimited for an ongoing bill such as a monthly membership;
- To send a receipt or not; and
- The day for the payment to take place. There are a lot of options to this one – a day of the week, a day of the month, etc. depending on the frequency.
Setting the Payment Method
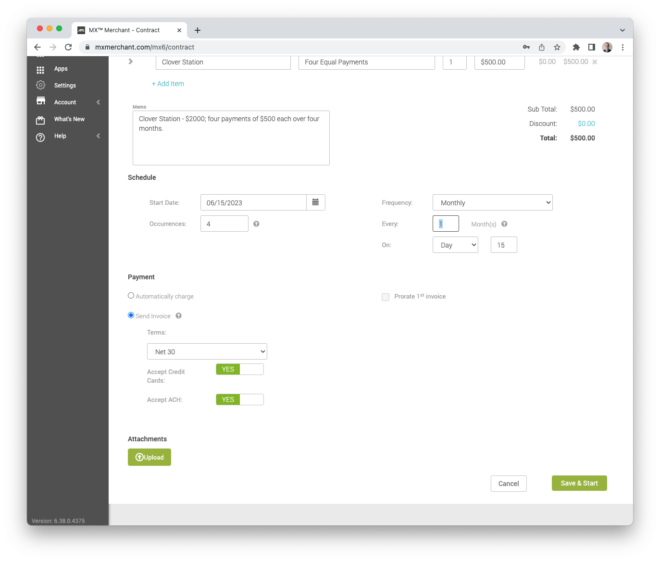
You have two choices for payments – to Automatically Charge a card or to Send Invoice.
If you select the Automatically Charge option, you can select a stored payment card, or enter a new card.
It’s important to note that cards are stored as tokens in MX Merchant, so once entered, you can only see the last four digits of the card. This is a security measure to ensure that card data cannot be stolen.
Sending an Invoice
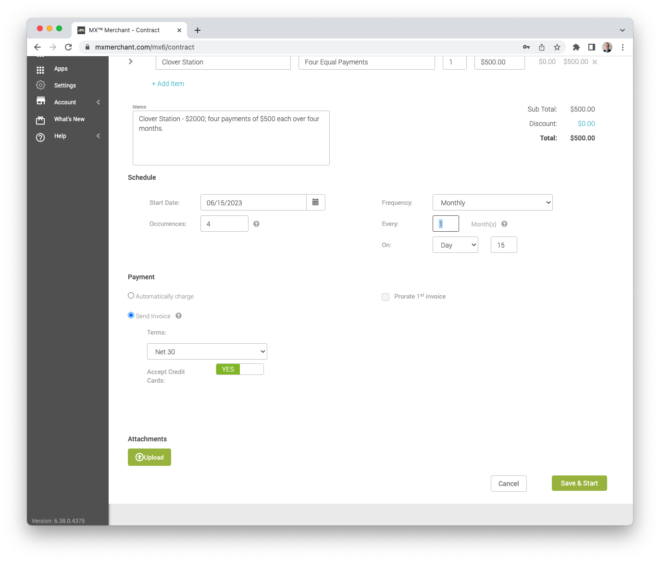
If you’ve selected the Send Invoice option, you have a few more settings you can choose from to fine tune the invoice:
- You can select the Terms: None, Upon Receipt, or Net 15, 30, 60 or 90;
- Accept Credit Cards is on by default
Saving and Starting your Contract
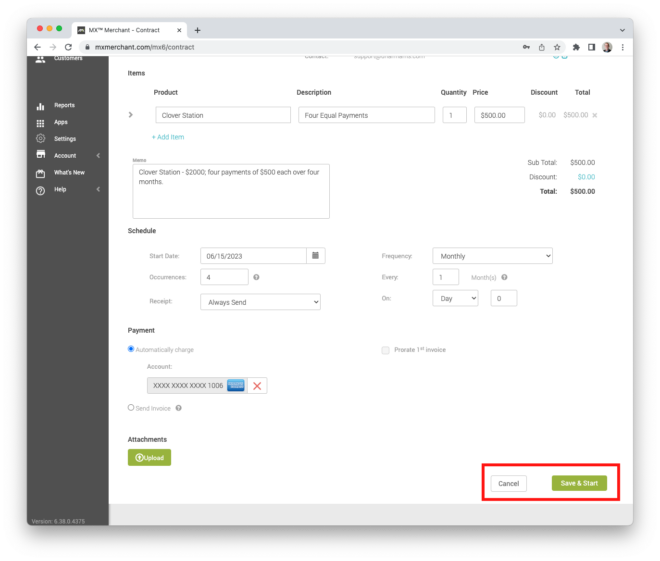
Once you have entered all the data, and set your recurring billing schedule and payment terms, it is critical that you select Save & Start in the lower right hand corner of the Add Contracts page. If you don’t, all your work is lost. If you’ve changed your mind about this contract, you can also select Cancel to close the window without saving any of your data.
Editing a Contract
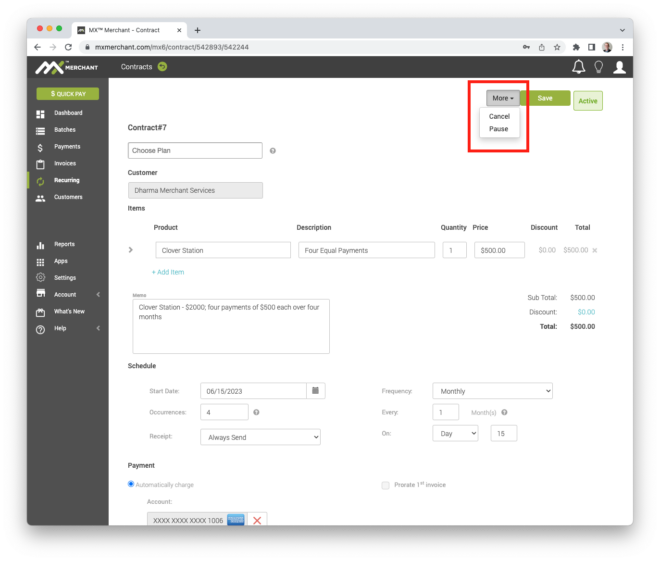
Once a Contract is saved, you can still make edits to it. You do so by clicking the contract to be edited in the Contracts landing page. Once the individual contract is open, you can Cancel or Pause it from the More dropdown in the upper right corner.
Contract History
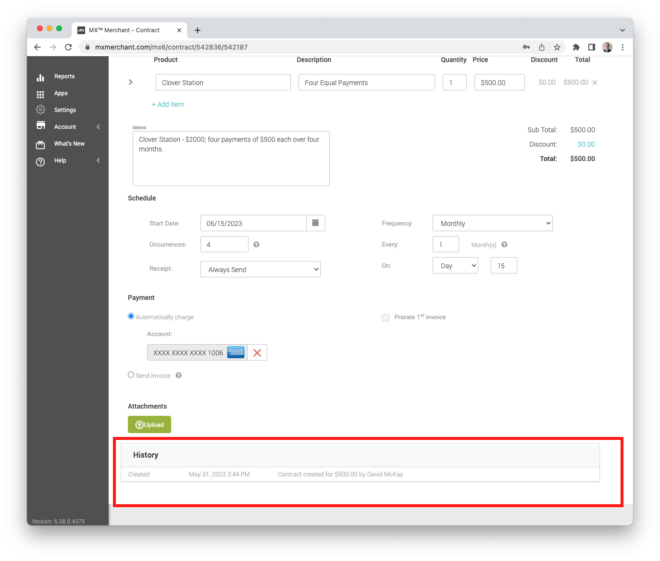
Once a Contract has been Saved & Started, a history is maintained at the bottom of the contract page. Here you can see any edits made, as well as all payments that have been taken for the contract.