MX Merchant – Managing Users
MX Merchant User Management is very straightforward and easy to understand

Where do I find my users in MX Merchant?
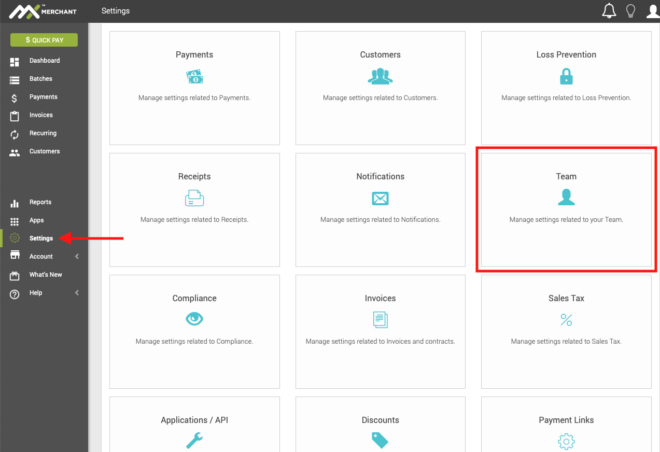
First off, only the Administrator of the MX Merchant account can create or manage users. You find user management in the Team section of Settings. To get here, Login into MX Merchant. Select Settings in the lower left hand navigation, and you should see Teams among the panels to the right.

Team Landing Page
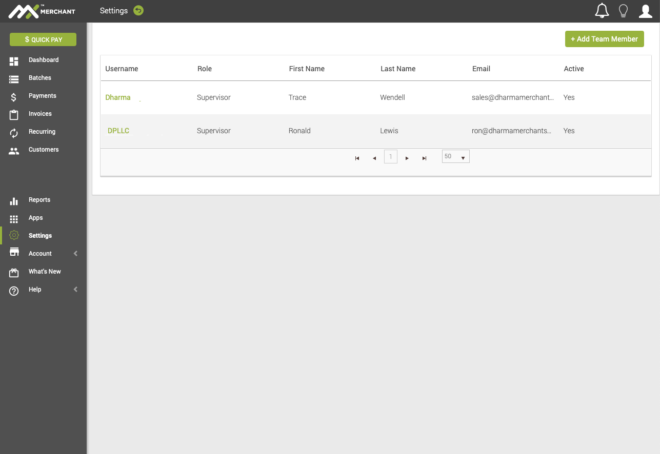
Once you have selected Teams, you will be taken to the Team Landing Page. This pages lists all the users of your MX Merchant account. From here you can add new users, and modify or delete existing users. To select a user, click on their Name, which appears in green.

Adding a New Team Member
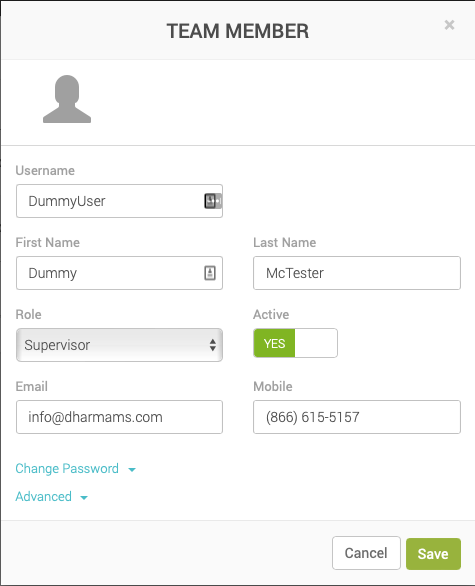
Adding a new team member is straightforward. You select the + Add Team Member option in the upper right corner of the page. A detail box opens, allowing you to type in all the necessary information about this user.
Because 2 Factor Authentication is now required for all users, you will need to fill in both the email and mobile phone number boxes in order to save the new user.
When you have finished entering the new user’s details, click Save in the lower right of the detail box.

Managing an Existing Team Member
To manage an existing team member, simply click on their Name. This will open up a similar detail sheet as the one you get creating a new team member. You can edit all the options, and Save or Cancel your modifications. Note in the bottom left corner of the detail sheet, you have two options: Change Password, and Advanced.
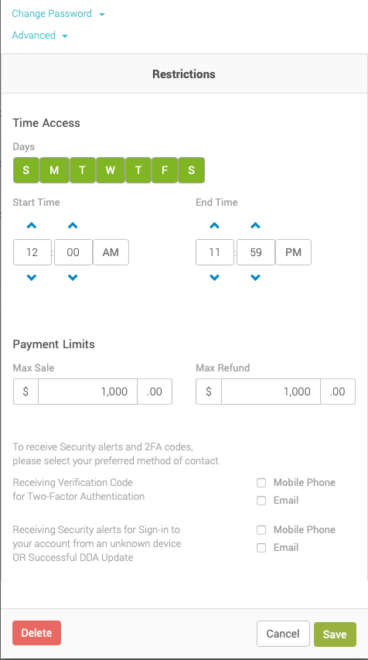
Advanced will allow you to access a different part of the detail sheet, where you can set more fine-grained access controls for the team member, including when they can access MX Merchant, limits on the size of transactions and refunds, and set up their 2 Factor Authentication. Make sure to Save or Cancel when complete.
In Advanced options, you can also Delete the user by selecting the button at the lower left of the advanced detail sheet.